







You upload an image to your website.
It looks great.
Then you check the file size and suddenly you’re staring at a 3 MB JPG that only needs to appear 800 pixels wide on the page.
Yeah, that’s a problem.
Images are one of those things that can quietly make a website slower. You might have clean code, good hosting, and a lightweight theme, but a page packed with huge images can still take its sweet time loading.
And the fix is usually pretty simple.
Start with the images.
Why are website images so important?
Every image on your page has to be downloaded by the visitor’s browser.
So if your page has 10 images and each one is around 1 MB, you’re asking the visitor to download roughly 10 MB of image data alone.
That’s a lot.
And mobile visitors can feel it even more when they’re using a slower connection.
This is why I always recommend checking an image before uploading it. Look at the dimensions, look at the format, and most importantly, look at the file size.
You don’t want to send a 5000 × 3500 pixel image to someone when it only appears as a small image inside a blog post.
JPG, PNG, or WebP?
Here’s the simple version.
JPG is great for photographs and images with lots of colors. It’s been around forever, and there’s a reason it’s still everywhere.
PNG is useful for things like logos, screenshots, graphics, and images that need transparency. The quality can be excellent, but the files can get surprisingly large.
Then there’s WebP.
WebP was made with web images in mind. Depending on the image and compression settings, it can give you a smaller file than the equivalent JPG or PNG while keeping the quality looking good.
That’s why WebP has become such a common choice for websites.
How to convert JPG to WebP
Let’s say you’ve downloaded a photo for your blog and it’s a JPG.
You could upload it directly.
Or you could convert it to WebP first and check whether you can get a smaller file without making the image look bad.
The process is pretty quick:
- Select your JPG image.
- Upload it to a JPG to WebP converter.
- Convert the image.
- Download the WebP file.
- Open it and check the quality.
- Upload it to your website.
You can do this directly with the image tools on jpg-to-webp.
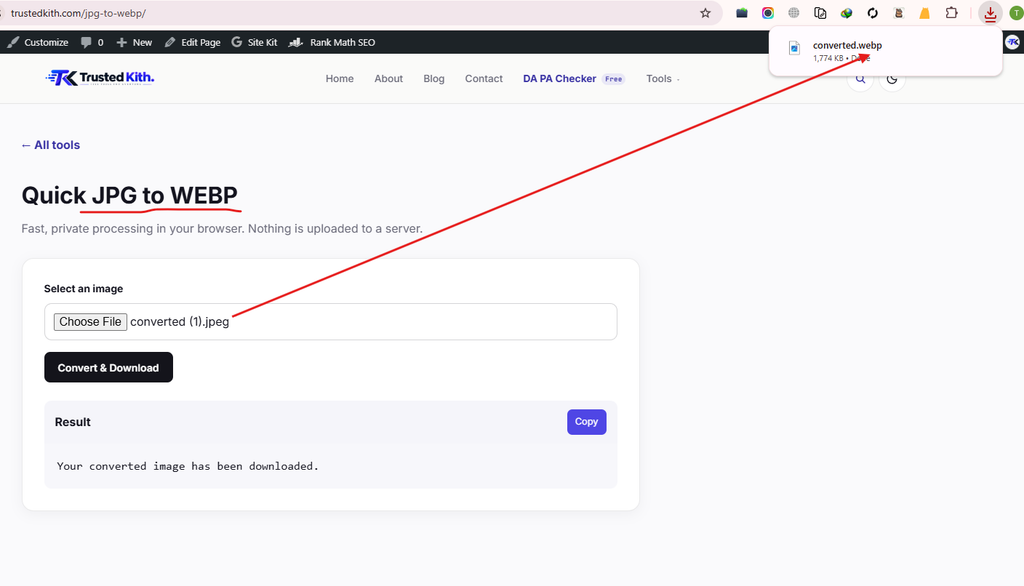
No complicated image editor needed for a basic conversion.
What about PNG to WebP?
The same idea works with PNG.
Maybe you’ve got a large PNG screenshot, graphic, or website image sitting on your computer.
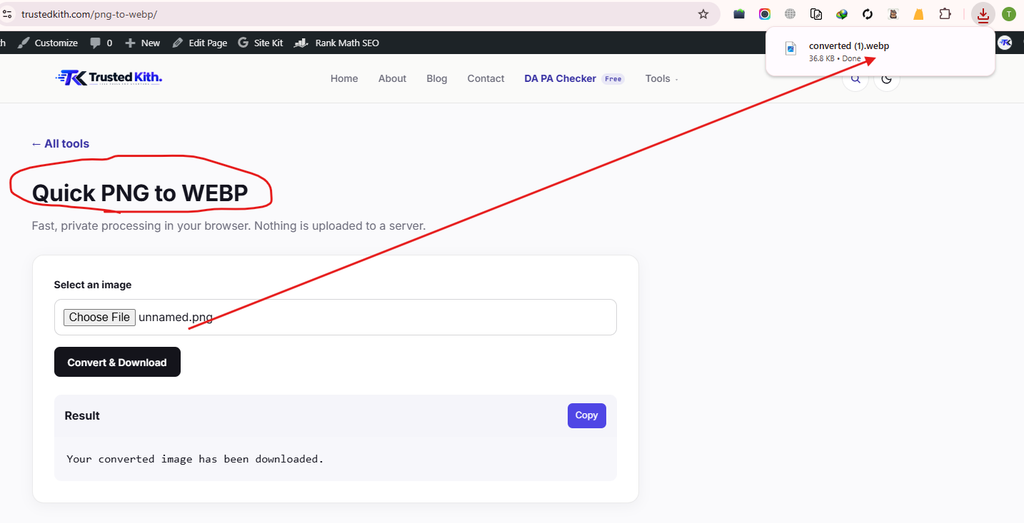
Upload it to a PNG to WebP converter and compare the result.
Pay attention to 2 things:
File size and image quality.
If the original PNG is 2 MB and the WebP version is much smaller while still looking clean, you’ve got a better file for your website.
But don’t blindly chase the smallest number.
If your screenshot contains tiny text and the converted version makes that text look fuzzy, the smaller file isn’t worth it.
There’s another thing people forget: image dimensions
This one gets overlooked all the time.
Imagine you have an image that’s 6000 pixels wide.
Your blog content area displays it at about 900 pixels wide.
Why upload the 6000-pixel version?
You’re carrying around thousands of pixels that your visitor doesn’t need.
Resize the image before you upload it.
For example, if your content area needs an image around 900 pixels wide, create a sensible version for that space instead of throwing the original camera-sized file onto the page.
It’s a small change, but when a page has several images, those small changes add up.
Compression can shrink the file even more
Format conversion and resizing aren’t the whole story.
Compression matters too.
A large image can sometimes be reduced considerably while still looking perfectly fine on a website.
Think about a normal blog photo.
Nobody is going to zoom into every pixel.
If you can reduce the file size while the image still looks sharp on the page, that’s a good trade.
Screenshots and graphics need a little more care because compression can make small text or sharp edges look messy.
So always check the result.
I built Trusted Kith for these small image jobs
This is exactly where having a bunch of separate image tools becomes annoying.
One website tells you to convert PNG to JPG.
Another one handles WebP.
Then you need an image compressor.
Then you need something else to resize the image.
Before you know it, you’ve got 6 browser tabs open just to prepare one blog image.
At Trusted Kith, I put these image tools together in one place.
You can work with JPG, PNG, and WebP files and convert between common formats.
For example:
- JPG to PNG
- PNG to JPG
- JPG to WebP
- PNG to WebP
- WebP to JPG
- WebP to PNG
There are also tools for compressing images and resizing them.
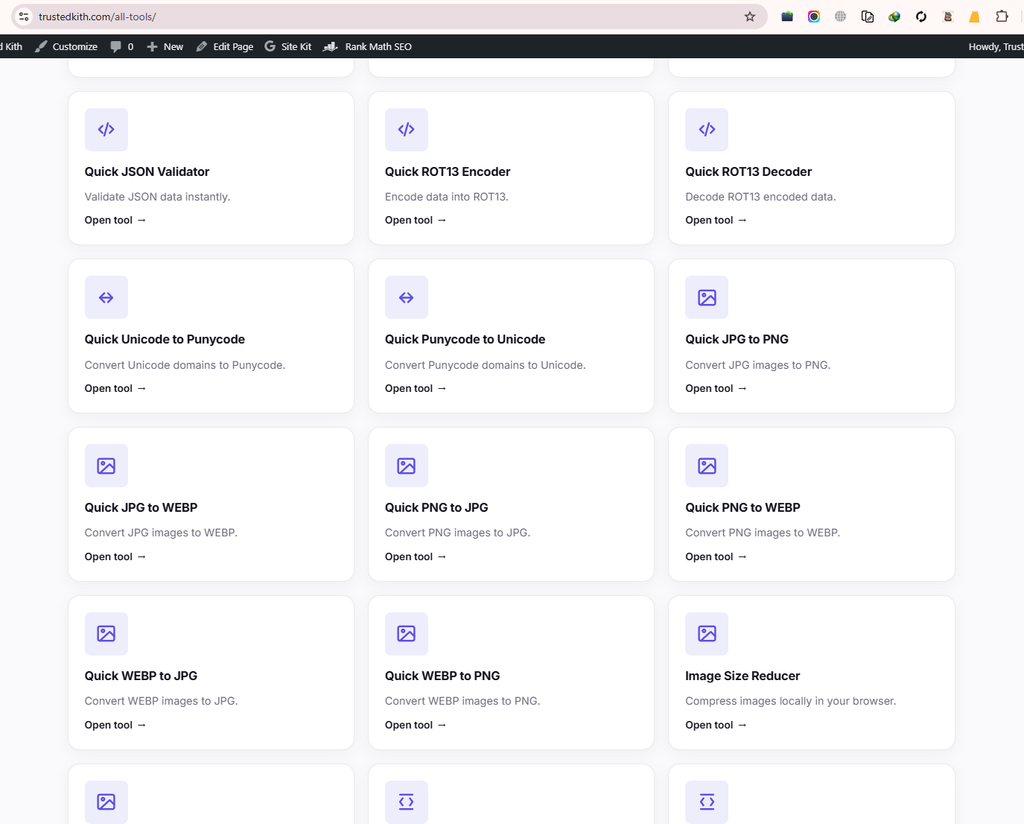
So if you’re preparing images for a website, you can handle the basic jobs without jumping between different websites.
A simple workflow I use for website images
Here’s the process I’d follow before putting an image on a website.
First, check the dimensions.
Is the image much larger than the space where it’ll appear?
Resize it.
Then check the file size.
If it’s huge, compress it.
Then choose the format.
For many website images, WebP is worth considering.
Finally, look at the actual image.
Don’t trust the file size alone. Open it and make sure it still looks good.
That’s it.
You don’t need a 14-step image optimization ritual before publishing a blog post.
Should you convert every JPG and PNG to WebP?
I’d say no.
WebP is useful, but every image has a different job.
A photograph is different from a transparent logo.
A screenshot is different from an illustration.
A simple graphic might behave differently from a detailed photo after compression.
So convert the image, check the result, and make the decision based on the actual file.
If the WebP version is smaller and still looks good, use it.
If something looks wrong after conversion, try another setting or keep the original format.
Don’t make your visitors download pixels they don’t need
This is probably the easiest way to think about image optimization.
If your website only needs an image that’s 1000 pixels wide, don’t make the visitor download a 5000-pixel image.
If an image can be compressed without looking worse, compress it.
If WebP gives you a smaller file with good quality, use WebP.
You’re simply removing unnecessary weight from the page.
And your visitors are the ones who feel the difference.
Your image optimization checklist
Before uploading an image to your website, quickly check:
- Is the image larger than it needs to be?
- Can I resize it?
- Is the file size unnecessarily high?
- Can I compress it?
- Would WebP make sense for this image?
- Does the converted image still look good?
Five minutes spent preparing your images can save your visitors a lot of unnecessary downloading.
Final thoughts
Image optimization doesn’t have to become some complicated technical project.
Start with the basics.
Resize oversized images. Compress large files. Use the right format. And give WebP a try when it makes sense.
If you’re working with JPG, PNG, and WebP files, you can find the converters, image compressor, and image resizing tools together on Trusted Kith.
Pick your image.
Prepare it.
Then upload it.
Your website doesn’t need to carry around a 4 MB image just because the original looked good on your computer.